
Intrecci parte 2 | Crossings part 2
 | |
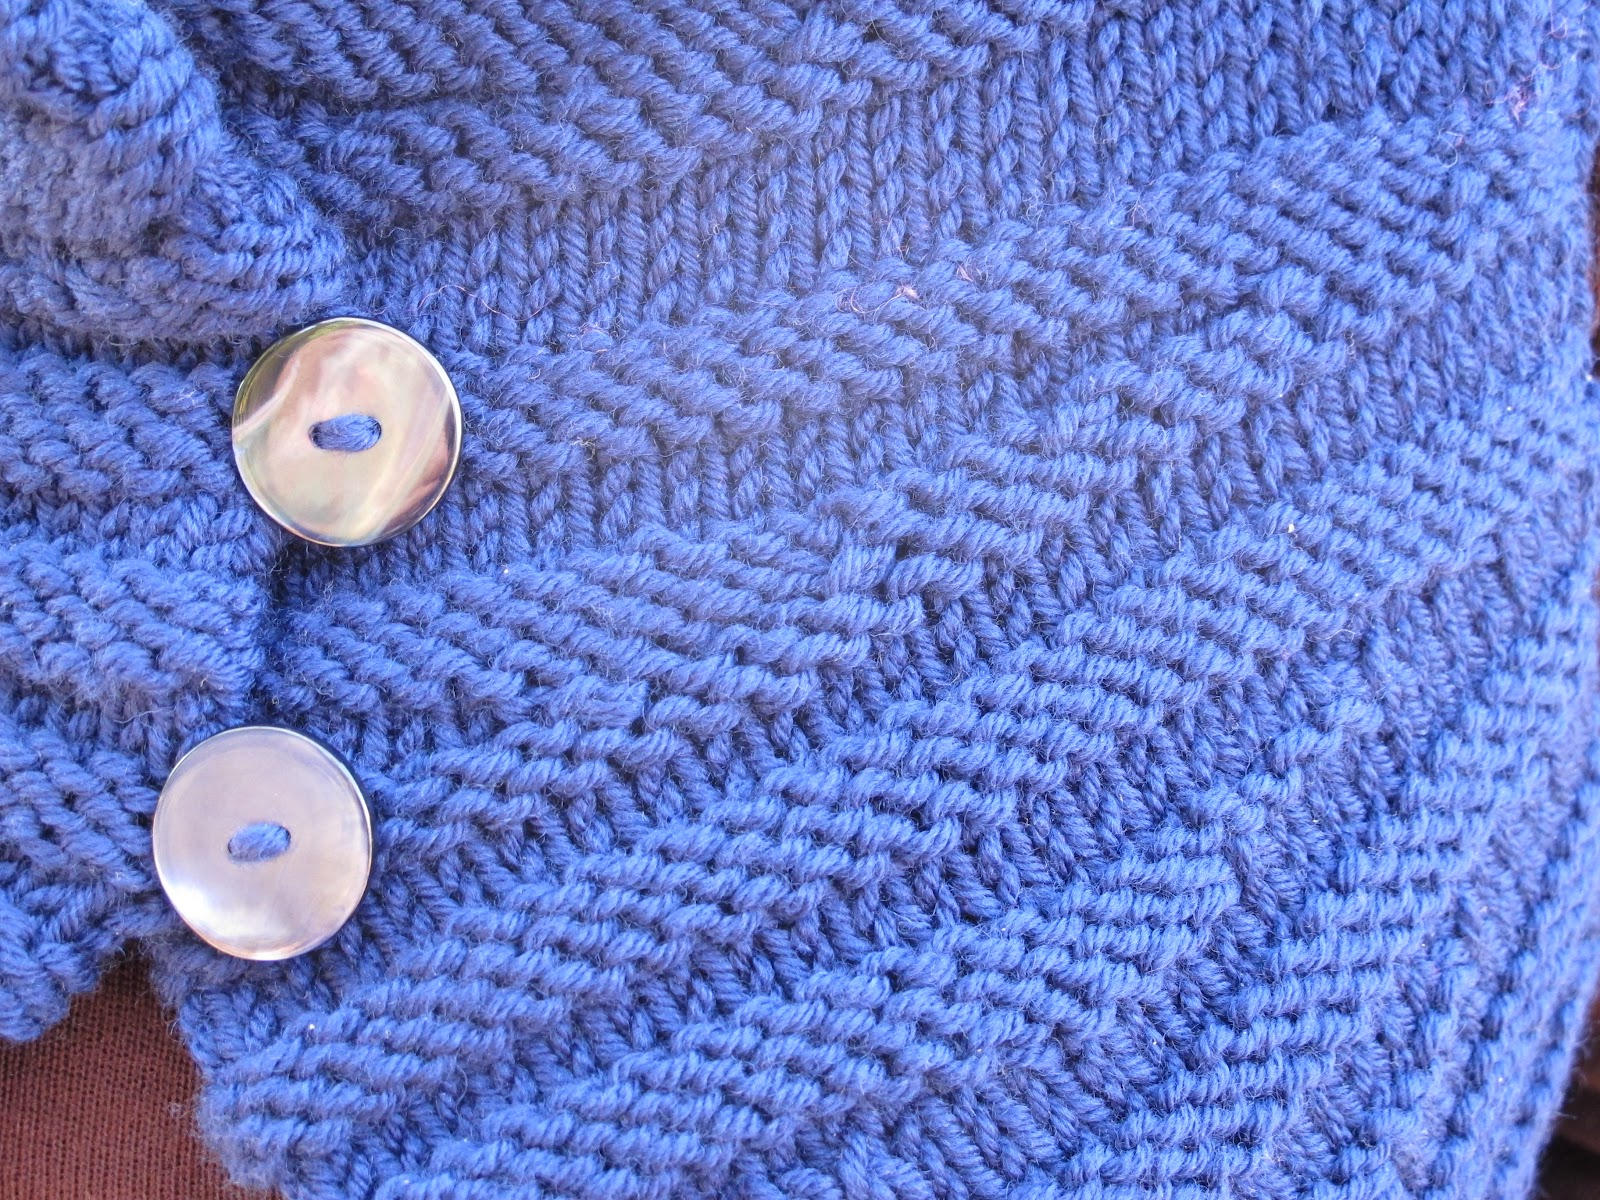
| Rosamund's Cardigan by Andrea Pomerantz, Interweave Knits Fall 2009 |
Ho parlato a grandi linee delle trecce più sotto in questo
post, ma oggi voglio parlarvi sulle
trecce double face, quelle che, comunque le rigiri, vanno bene.
I
spoke about
cables before in this post,
but today I want to talk about double-faced cables, those which, however you turn them, they
look good.
Nelle ultime settimane mi sono concentrata sul pullover di
mia sorella che lo ha richiesto a collo alto e con le trecce, lasciandomi poi
carta bianca. Ho così deciso di prolungare le trecce del busto fino alla fine
del collo e ho così sperimentato per la prima volta le trecce reversibili in
modo da poterle vedere anche quando il collo è rigirato su se stesso.
In
the last few weeks I concentrated myself on the sweater for my
sister, who required a high
collar and cabled garment,
giving me with carte blanche. I therefore decided to
extend the braids of the body
until the end of the neck so I experimented for the first time reversible cables, visible even when the neck is rolled on itself.
Esistono due tipi principali di trecce reversibili.
1. Trecce che sembrano uguali
sul davanti e sul retro del lavoro. Si possono realizzare
trecce double face di ogni misura e forma alternando all’interno della treccia diritti
e rovesci creando così una treccia a coste 1/1 che rimane ben visibile e
delineata sia sul diritto che sul rovescio del lavoro, che dà l’illusione di
una superficie liscia a maglia rasata su ambo i lati.
2. Capi reversibili che hanno
trecce su ambo i lati. Questo tipo di trecce sono solitamente realizzate a maglia rasata
diritta, circondate da un fondo a maglia rasata rovescia che esalta le trecce
stesse. L’area a maglia rasata rovescia diventa maglia rasata diritta dall’altro
lato del lavoro permettendo così la realizzazione di altre trecce sul rovescio.
There
are two main types of reversible cables.
1. Cables that look the same on the front and the back of the work. Every
size and shape braids can be made reversible by
alternating knits and purls, creating a 1/1 ribbed braid which remains
clearly visible and delineated on
both right and wrong side of the project,
which gives the illusion of a
smooth surface in stockinette stitch on both sides.
2. Reversible garments that have cables on both sides. This type of braids are usually made in stockinette stitch, bordered by reverse stockinette stitch that makes the braids pop. The areas of reverse stockinette become stockinette on the back side, of course, creating another place to cable.
2. Reversible garments that have cables on both sides. This type of braids are usually made in stockinette stitch, bordered by reverse stockinette stitch that makes the braids pop. The areas of reverse stockinette become stockinette on the back side, of course, creating another place to cable.
Io mi sono avvalsa della prima tecnica e il risultato che ho ottenuto mi
soddisfa e mi piace molto!
I have used the first technique and the result really satisfies me and I love it!
 |
| Farmer's Market Cardigan by Connie Chang Chinchio, Interweave Knits Fall 2009 |
Fair
Isle
In
questi giorni mi sto dilettando con la tecnica del Fair Isle, colpa di mio
nipote che ha voluto un cardigan con un decoro di fiocchi di neve. Così ho
colto l’occasione per documentarmi un po’.
Molti
chiamano Fair Isle ogni lavoro a maglia eseguito con l’uso di fili di vari colori, ma in realtà è
una tecnica nata verso la metà del 1800 nell’omonima isola, vicino alle
Shetland e Orkneys. Secondo Alice Starmore, autrice del libro "Book of Fair IsleKnitting", esistono una serie di regole per eseguire un Fair Isle ad hoc:
- Il disegno da seguire è basato su un’alternanza di motivi OXO (ottagoni e croci), anche se con il passare del tempo a questi due classici elementi se ne sono aggiunti di nuovi, come bordure, onde, stelle norvegesi, motivi a tassello ed altri disegni ripresi da quelli per il punto croce, creando così combinazioni infinite;
- Il lavoro è eseguito in tondo in bande di motivi che si alternano ogni 17 o 19 ferri circa;
- Il motivo, simmetrico, deve contenere linee diagonali in modo da distribuire uniformemente la tensione delle maglie ed assicurare così un capo elastico;
- Originariamente le lane usate erano le Shetland (oggi abbiamo una scelta ben più ampia), scegliendo due colori per ferro (ed un numero illimitato di colori per capo) e scambiandoli ogni 5-7 maglie al massimo per evitare lunghi passaggi di filo sul retro del lavoro.
I
capi eseguiti con la tecnica del Fair Isle prevedono tradizionalmente la
lavorazione in tondo, tagliando il lavoro per poi inserire altre parti, come
per esempio le maniche. Il taglio è conosciuto come steek e viene lavorato su
un numero pari o dispari di maglie (da aggiungere extra al motivo da seguire),
alternando due colori per ferro. Solitamente per evitare che le maglie si
disfino, prima di essere tagliato, lo steek viene rinforzato con una cucitura o
con un giro di maglia bassa all’uncinetto.
E’
però possibile lavorare Fair Isle anche avanti e indietro, senza dover unire in
tondo il capo. In questo caso i colori si scambiano all’inizio o alla fine di
ogni ferro tagliando il filo e lasciando una coda di circa 10 cm. Il filo del
colore seguente viene annodato alla coda del precedente e così via. Una volta
finito il lavoro i nodi vengono sciolti, le maglie tirate e i nodi rifatti più
stretti, infine vengono nascoste tutte le code sul retro del lavoro.
E ora all’opera!

In these days I'm delighting myself
with the technique of Fair Isle, because my nephew wants a cardigan with a
snowflake motif. So I took the opportunity to read a bit about this technique.
Many call Fair Isle knitting
each kind of stranded color knitting, but in reality it is a technique born in
the mid 1800's in the homonymous island, near the Shetlands and Orkneys. According
to Alice Starmore, author of “Book of Fair Isle Knitting”, there are a number
of rules to follow to knit a Fair Isle ad hoc:
- The pattern is based on the alternation of OXO motif (octagons and crosses), although with the passage of time to these two classic elements have been added new ones, like borders, waves, Norwegian Stars, tessellated patterns and other motifs taken directly from cross stitch charts, creating endless combinations;
- Fair Isle is worked in the round, in pattern bands each of about 17 or 19 rows;
- The pattern, usually symmetrical, must contain diagonal lines in order to evenly distribute the tension of stitches, providing an elastic fabric;
- Originally just Shetland wool was used (now we have a much wider choice), only two colors per row (and an unlimited number of colors per garment) exchanging them frequently, at the most every 5-7 stitches to avoid long passages of yarn on the back of the work.
Fair Isle garments are
traditionally knitted in the round, then cutting open the work in order to add
other parts, such as sleeves. The cut is known as steek and is worked on an odd
or even number of stitches (to be added extra to the motif), alternating two
colors per row. Typically, to avoid the stitches from unraveling, the steek is
reinforced with a zigzag-stitch sewing or with single crochet stitch before
being cut.
However, it is also possible
to work Fair Isle garments back and forth without having to join them in the
round. In this case the colors are exchanged at the beginning or end of each row,
cutting the yarn and leaving a tail of about 10 cm. The following color is tied
to the previous tail and so on. Once the project is finished, loosen and untie
the knots, pull on the ends to tight the stitches and retie the knots firmly,
then weave in all ends on the wrong side of the fabric.
And now back to work!

Intrecci parte 1 | Crossings part 1
La treccia è un motivo decorativo
della maglia e si ottiene incrociando un gruppo di maglie davanti o dietro a un
altro gruppo di maglie, scambiando così la loro posizione. Questa facile
azione, che però necessita di una certa pratica e pazienza, permette di creare
un’ampia gamma di trecce: variando il numero della maglie coinvolte, il punto
utilizzato e l’intreccio si possono infatti ottenere tantissimi motivi diversi.
Cable is a decorative knitting motif and you
obtain it crossing a group of stitches in front or behind another group of
stitches, permuting their position. This easy action, that nonetheless needs
some practice and patience, permits the creation of an infinite number of
cables: varying the number of stitches, the pattern used and the direction of
the crossing you can in fact obtain a lot of different pattern.
 Per fare una treccia un certo
numero di maglie viene messo su un piccolo ferro (a volte ricurvo per far sì
che le maglie non scappino via), viene poi lavorato lo stesso numero di maglie
dal ferro sinistro e infine si riprendono la maglie sospese e si lavorano. Se
volete un treccia che si arrotoli verso sinistra metterete le maglie in sospeso
davanti al lavoro, se invece ne volete una che si arrotoli verso destra le maglie
dovranno essere sospese sul dietro del lavoro.
Per fare una treccia un certo
numero di maglie viene messo su un piccolo ferro (a volte ricurvo per far sì
che le maglie non scappino via), viene poi lavorato lo stesso numero di maglie
dal ferro sinistro e infine si riprendono la maglie sospese e si lavorano. Se
volete un treccia che si arrotoli verso sinistra metterete le maglie in sospeso
davanti al lavoro, se invece ne volete una che si arrotoli verso destra le maglie
dovranno essere sospese sul dietro del lavoro.
To make a cable, a certain number of stitches is placed on a small
cable needle (sometimes curved
so that the stitches
do not run away), is then worked the same number of stitches from the
left needle and then the suspended ones. If
you want a cable twisted
to the left put the
suspended stitches in front the work,
but if you want one that twists to the right you have to suspended
them on the back.
L’incrocio delle maglie non viene
eseguito ad ogni ferro, ma dopo un dato numero di ferri lavorati senza
incrociare che di solito corrisponde al numero delle maglie che compongono la
treccia. Per esempio, se la mia treccia è di 4 maglie, lavorerò il ferro con
l’incrocio ogni 4 ferri pieni.
The crossing of the stitches
is not performed on every row, but after a given number of plain rows that usually corresponds to the number of stitches
that forms the cable. For example,
if my cable is
made of 4 stitches, I will work the crossing every 4 plain rows.

Le trecce, che normalmente sono
lavorate a maglia rasata diritta,per essere messe ancora di più in risalto,
sono fatte precedere e seguire da un variabile numero di maglie lavorate a
maglia rasata rovescia. In questo modo la treccia sarà molto meglio visibile e
anche più bella.
Cables, which are normally worked
in stockinette stitch, to be even
more emphasized, are
preceded and followed by a variable
number of stitches knitted in reverse stockinette stitch. In this way the cable will
be much more visible and more
beautiful.
Quando si inseriscono delle
trecce all’interno del lavoro è utile tenere presente che il capo risulterà
molto meno flessibile a causa della diversa tensione delle maglie, decisamente
più stretta e densa di quella che si ottiene se il capo è lavorato senza
trecce. Ricordatevene quindi quando volete passare da una sezione lavorata a
trecce a una lavorata a maglia rasata, avendo cura di aumentare il necessario
numero di maglie, ma soprattutto ricordatevene al momento di calcolare il
numero di matasse o gomitoli che vi occorrono visto che ve ne serviranno
certamente di più.
When inserting cables into a work is useful to keep in mind that the garment will be much less flexible because of the different gauge
and tension, significantly narrower and
denser than what is
obtained if the garment is
worked without cables. Remind it when you move
from a cable section to another worked for example in stockinette stitch, taking care to increase
the necessary number of stitches, but especially remind it when calculating the number of skeins or balls that
you need because they will certainly be more.
 Esistono svariate trecce ma le
più comuni sono sicuramente quelle costituite da due serpentine che si attorcigliano,
verso destra o verso sinistra, come in
una corda. Se le serpentine sono cinque la treccia viene chiamata Principessa
Celtica (i motivi Celtici non sono altro che motivi ispirati dalle opere d’arte
celtiche, spesso in metallo, decorate con bellissimi e intricati nodi), mentre
se sono sei viene definita Treccia Sassone che crea un motivo quadrato spesso
usato nei maglioni in stile Aran. Come ho già detto, si possono inventare una
miriade di motivi a trecce variando in loro numero, la distanza tra un
intreccio e l’altro, la posizione degli intrecci, o intrecciando trecce più
piccole a formarne di più grandi, c’è n’è insomma per tutti i gusti!
Esistono svariate trecce ma le
più comuni sono sicuramente quelle costituite da due serpentine che si attorcigliano,
verso destra o verso sinistra, come in
una corda. Se le serpentine sono cinque la treccia viene chiamata Principessa
Celtica (i motivi Celtici non sono altro che motivi ispirati dalle opere d’arte
celtiche, spesso in metallo, decorate con bellissimi e intricati nodi), mentre
se sono sei viene definita Treccia Sassone che crea un motivo quadrato spesso
usato nei maglioni in stile Aran. Come ho già detto, si possono inventare una
miriade di motivi a trecce variando in loro numero, la distanza tra un
intreccio e l’altro, la posizione degli intrecci, o intrecciando trecce più
piccole a formarne di più grandi, c’è n’è insomma per tutti i gusti!
There are many different cables, but definitely the most common are those consisting of two braids that are twisted
to the right or left, like a rope. If the braids are five then
the cable is called Celtic
Princess (Celtic motifs are just motifs inspired by the
beautiful, intricate knots and braids of Celtic metalwork and art), but if they are six
is defined Saxon Braid,
a cable that creates a square
pattern often used in Aran sweaters. As I
said, you can invent a myriad of cable
patterns varying the number of
cables, the distance between a
crossing and the other, the
position of those crossings, or creating bigger cables
by crossing smaller ones to and so on. There is a cable
for everyone!

Quando venne inventato, tutti lo conoscevano con il suo nome usato per esteso: idiot-cord, cordoncino idiota. Poi è stato rivalutato e adesso viene usato in mille modi diversi.
When it was created, everybody used to call it
with its full name: idiot- cord; but nowadays is very popular and it is used in
a thousand of different ways.
Ma che cos’è? L’i-cord è un tubicino/cordoncino che ben si presta alla realizzazione di tantissime idee: arrotolato su se stesso a formare fiorellini e forme decorative varie, come bordo o occhielli per i maglioni (Shalder di Gudrun Johnson, The Shetland Trader – Book one), come cintura e via dicendo. Si può perfino usare per realizzare le dita dei guanti (vedi qui). Insomma chi più ne ha, più ne metta.
What is it? I-cord is very similar to a tiny tube
and can be used for several purposes: to create flowers or other decorative
shapes, to knit edges or bottonholes for pullovers or cardigans (Shalder by
Gudrun Johnson, The Shetland Trader – Book one), like belt and so on. You can
even us it to knit gloves’ fingers (check it out here). Free your imagination!
Io l’ho sempre usato in solitaria, ossia come oggetto staccato dal resto lavoro, facendone sempre una cintura da abbinare a qualche cardigan. Stavolta ho avuto l’occasione per farne un bordo e ho finalmente preso atto della versatilità dell’i-cord. La tecnica di realizzazione non cambia molto, è pur sempre facile (forse anche banale) come bere un bicchier d’acqua! Unica differenza, per l’i-cord “solitario” abbiamo inevitabilmente bisogno di ferri a doppia punta o circolari, invece per l’i-cord attaccato al lavoro sono sufficienti i ferri diritti.
Io l’ho sempre usato in solitaria, ossia come oggetto staccato dal resto lavoro, facendone sempre una cintura da abbinare a qualche cardigan. Stavolta ho avuto l’occasione per farne un bordo e ho finalmente preso atto della versatilità dell’i-cord. La tecnica di realizzazione non cambia molto, è pur sempre facile (forse anche banale) come bere un bicchier d’acqua! Unica differenza, per l’i-cord “solitario” abbiamo inevitabilmente bisogno di ferri a doppia punta o circolari, invece per l’i-cord attaccato al lavoro sono sufficienti i ferri diritti.
I always used it sole, I mean like object
separated from the rest of the knitting, using it always like a belt to fasten some
cardigans. But finally I had the occasion to utilize it for an edge and I
realize that it is a very versatile thing. The technique to make it doesn’t
change that much and it is still easy (maybe even banal) like drinking a glass
of water! There is just one difference: for the “solitary” i-cord you inevitably
need double pointed or circular needles, while for the i-cord that is knitted along
with the garments you can use just a pair of straight needles.
Ecco qui come si fa l’i-cord “solitario”:
- Montare il numero di maglie desiderato, lavorarle a diritto e non girare il lavoro
- Scambia i ferri e metti nella mano sinistra quello con le maglie, fai scivolare la maglie fino all’altro lato del ferro, passa il filo dietro tirando leggermente e lavorale di nuovo a diritto
- Ripeti questi due passaggi finchè non ottieni un i-cord della lunghezza voluta.
Here are the steps to knit the “solitary”
i-cord:
- Cast on the desired number of stitches, knit them and do not turn the work
- Swap needles in your hand (stitches on the left again) and slide the stitches to the other end of the needle, pass the yarn around the back and knit again
- Repeat these two passages until you have an i-cord of the desired length.
Esempio:
- Lavoro 3 maglie a diritto per l’i-cord, 50 maglie in motivo, poi giro il lavoro
- Lavoro 50 maglie in motivo, passo 3 m a rovescio
- Giro e ripeto i due passaggi precedenti

To make the i-cord knitted along with the garment you don’t need to slide the stitches from one side of the needle to the other one, but you have to knit the whole row and then slip the stitches on the wrong side of the work and so on.
Here an example:
- (RS): K 3 (i-cord), knit in motif to the end
- (WS): knit in motif to the last 3 sts, slip 3 purlwise
- Repeat these two steps.

C’è poi una terza variante dell’i-cord, quella che permette di usarlo perpendicolarmente al lavoro come bordo finale, a creare un orlo decorativo saldo e carino, ma allo stesso tempo semplice e senza troppi fronzoli. Ecco come fare:
- una volta fatto l’ultimo ferro del lavoro, avviare 3 nuove maglie (vedi cable cast on)
- *Lavora a diritto 2 maglie, lavora due maglie insieme a diritto ritorto. Passa le 3 maglie lavorate sul ferro sinistro, poi tira il filo dietro queste tre maglie*
- Ripeti da * a *
- When you have finished the last row of your item, cast on (cable cast on) 3 new stitches
- *k2, k2tog tbl. Slip the 3 worked stitches back onto the left hand needle and pull the yarn across their back*
- Repeat from * to *
I used the i-cord to make the edges of the skirt Carnaby (designed by NiKol Lohr and published in Knitty Deep Fall 2010).
Ferri accorciati | Short rows
Non è la prima volta che uso i ferri accorciati, ma
stavolta voglio spendere due parole su questa tecnica.
Intanto di cosa si tratta: in pratica vengono
lavorati parzialmente uno o più ferri fino ad arrivare ad una data maglia (ad
esempio se ho un ferro di 40 maglie, mi posso fermare alla 36esima), si gira
poi il lavoro e si torna indietro fino alla fine del ferro o fino a un’altra
data maglia, e così via. Ferri accorciati, appunto. Di solito, quando si gira
il lavoro, si passa la maglia successiva al punto in cui si deve arrivare
avendo cura di avvolgerci intorno il filo cosicché non
si vengano a formare indesiderati buchini tra un passaggio e l’altro (detta
così sembra difficile, in realtà è una tecnica davvero facile e veloce). C’è
poi a chi, questi buchini, piacciono tanto da farne un motivo decorativo e da
sfruttarli a mo’ di asole per eventuali bottoni. A voi la scelta.
Detto questo, i ferri accorciati a cosa servono? A
una miriade di cose. Permettono di sagomare maglioni, pullover e via dicendo
creando un più delineato punto vita o giro seno o dando una più gradevole forma
alle spalle. Oppure possono essere usati per creare le
pieghe in una gonna, come qui. O ancora ci si può giocare, realizzando capi
dalle forme un po’ più inusuali, ovviamente curve, come la fascia per capelli Calorimetry di la sciarpa a spirale
Spectra di Stephen West, o appunto Enso di Olga Buraya-Kefelian. Con i ferri
accorciati si possono fare i talloni dei calzini, oppure accessori per la casa, come tappeti o favolosi pouf. Insomma, i
ferri accorciati servono a dare una forma più morbida ai vostri lavori, con una
tecnica davvero facile, sofisticata e quasi invisibile. Comodo no?
Per finire, esistono almeno un paio di sistemi per
eseguire il fatidico avvolgimento del filo prima di girare il lavoro, ma il
migliore e quindi più famoso è quello ideato da Barbara G. Walker nel lontano
1972 e pubblicato in “Knitting from the top”. Ecco qui le istruzioni:
- Lavora fino alla data maglia (dove si dovrebbe girare il lavoro) e passa sul ferro destro la maglia successiva come per lavorarla a rovescio. Porta il filo davanti.
- Rimetti sul ferro sinistro la maglia passata e gira il lavoro – in questo modo la maglia passata è avvolta dal filo. Lavora a rovescio fino all’altra data maglia e ripeti il passaggio.
- Al ferro di ritorno, quando devi rilavorare le maglie passate e avvolte, fermati prima di lavorare la maglia avvolta, solleva con la punta del ferro destro l’avvolgimento e lavoralo insieme alla maglia corrispondente a diritto.
Infine, vi consiglio di guardare qui per vedere come si fa.
It is not
the first time that I use short
rows, but this time I want to spend few words
about this technique.
First of
all, what it is: in practice you have to partially
knit an existing row to a pre-determined stitch count (for
example if I have a row of 40 stitches,
I can stop at the 36th), then turn the work and work back to the same (or
another) count, and turn again, and so on. Just
before the work is turned, the yarn is generally wrapped around the next not knitted stitch to prevent a hole from
forming at the turning point. It sounds difficult, but it is actually a
technique very easy and quick.
There is whom like these little holes so much to make of them
a decorative motif and exploiting them for buttonholes. To you the choice.
That said, for what can you use
short rows? A myriad of things. They allow to
shape sweaters, pullovers and tops creating a
more outlined waist,
or permitting to knit a size larger just where you need
it, for example around your chest, or they give a more pleasing shape along the shoulders at the moment of the
binding off. Short rows
can be used to create skirt pleats, as here. They are also
useful in knitting garments with a little more unusual
shape, of course curved, as in the headband Calorimetry by in the
spiral scarf Spectra of Stephen West, or in Enso by Olga Buraya-Kefelian.
Short rows shaping can make sock heels elegantly curved, or home accessories, as rugs or fabulous beanbags. They can add some
shape and curve to everything you want in an easy, sophisticated and nearly
invisible way. Simple, is not it?
Finally,
there are at least a couple of ways to wrap the yarn around the slipped stitch, but the
best and the most famous is the one designed by Barbara G. Walker in the 1972 and
published in “Knitting from the top”.
Here the steps:
- Work up to the turning point, slip the next stitch purlwise and bring the yarn in front.
- Slip again the same stitch back to the left needle and turn – in this way the slipped stitch is wrapped. Purl to the next turning point.
- When working back over the slipped and wrapped stitch, work to the wrap, put the right needle under the wrap and into the slipped stitch on the left needle and knit them together.
Have a look here to see how to do it!
Sto provando a realizzare un cardigan per mia figlia nonostante le mie poche possibilità ma è molto "noioso", tutto a maglia rasata diritta in cotone a fil doppio rosa e avorio chiaro (il rsa da solo,non reggeva).Ho visto questa foto che tu hai pubblicato:-"Farmer's Market Cardigan by Connie Chang Chinchio, Interweave Knits Fall 2009 -e mi sembra adatto al mio lavoro. Come posso avere le spiegazioni? E anche in italiano ! Esempio di chi vuole troppo.! Naturalmente sono disposta ad acquistare il modello .Ti ringrazio davvero tanto .Ti scrivo l'indirizzo mail più facile per me : mafaldanonsorride@yahoo.it
RispondiElimina